I had previously setup a Windows Server 2008 Micro instance on AWS and ran a small website using IIS. I don’t believe Micro instances are a good choice with any flavor of Windows server because of the 613mb of RAM limitation which is quickly consumed by the OS. I don’t have the same issue with other similar sites I run on Ubuntu AMIs with Apache which is why I equate the performance issues to Windows only instances.
I decided I would give the S3 Bucket + Website combo a try in the hopes of doing away with this instance and improving the sites performance, all for less than the ~$15/month a 24/7 micro instance costs once you have exhausted the free period.
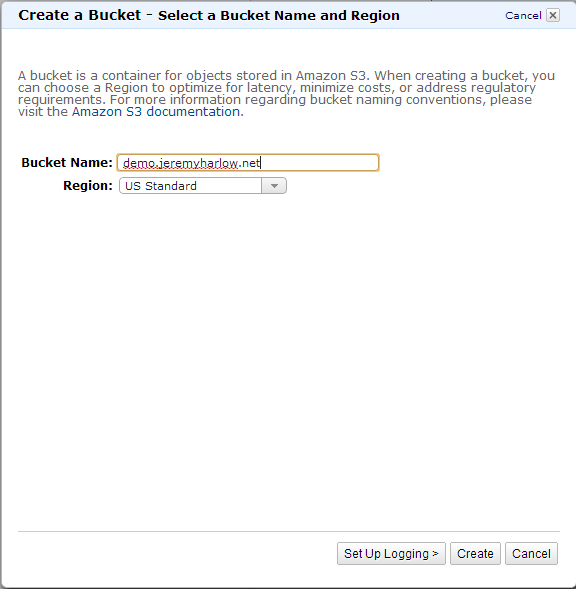
I created a new S3 bucket and named it demo.jeremyharlow.net, using this naming convention with the subdomain is important for creating a CNAME later, you won’t be able to point a subdomain to your S3 bucket if you name it something else like jeremyharlow.net, the CNAME you intend to use, if you intend to use one, must match the bucket name.
Once you create your bucket you need to enable the website feature and set the index file. Right click your bucket and select properties.

From here you need to navigate to the bucket and upload your website, ensuring that you have the index document you specified above in the root of the bucket. The only issue I ran into was that each individual image file & .html file need to be granted read/view permissions, a tedious process if you have a lot of files which, I did. This led me to the CloudBerry Explorer for Amazon S3.
The free version is all you need, available here (http://www.cloudberrylab.com/free-amazon-s3-explorer-cloudfront-IAM.aspx) this nifty little app lets you manage your S3 buckets with ease, including the bulk changing of file permissions.
The only oddball issue I ran into was that I had an image file called index.png, which was called inside my index.html file for a background, the image wouldn’t load so I renamed it to home.png and it worked just fine, not sure why I couldn’t name the file index.* but this quick fix worked so no harm done.
Everything should work if you use the endpoint address you should have noticed when setting up the bucket, but if you want to create a CNAME go to your DNS and create the record, this is why I used demo.jeremyharlow.net as my S3 bucket because I wanted that to be my CNAME, if I had used anything else then it wouldn’t work.